Entity Data Table Check is a new feature added to check few Custom details during certain actions that need to be done by making use of Custom Data Tables. For instance you need to check the existing Bank Account of the client before the creation of client. Then you can create your own Custom Data Table with column Existing Bank Account and check the details before the creation of client.
How to create Entity Data Table Checks
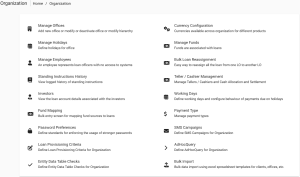
Step 1: From the main screen, click on Admin then Organization from the drop down list. This will launch the Organization menu. Select Entity Data Table Checks.
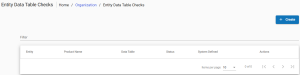
This will launch the Entity Data Table Checks page.
Step 2: Click the create button which will launch the page below;
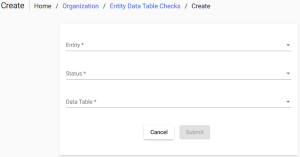
Field description
| Field | Description |
| Entity (mandatory) | This field describes which entity will undergo Entity Data Table Checks. Only four entities are supported with Entity Data Table Check and they are Client, Group, Loan and Saving Account. |
| Status (mandatory) | This field describes when the specified entity should undergo Entity Data Table Checks. The status is not same for all entity and the statuses are create, approve, activate, write_off, withdrawn, rejected and close. |
| Data Table (mandatory) | This field describes what need to be checked. These are custom data tables which are created in the manage table. Based on the Custom Data Table created, the additional screens are designed for the specified Entity during specified Status. All the columns given in the custom data table are displayed as fields in the additional screens created. |
| Product | This field is enabled only for Loan and Saving Account entity. All the Loan Products are captured in the drop-down for Loan entity and all the Save product will be captured in the drop-down for Saving Account entity. |
Creating Client Entity Data Table
Navigate to the Entity Data Table Checks page and then click the +Create Entity Data-Table Check button which will launch a pop-up box. Look through the previous section of this page to get details on how to navigate to the page.
From the Entity field, select Client from the drop-down menu.
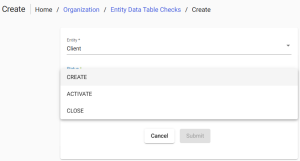
For Client entity, only three statuses are provided.
| Drop Down-values | Description |
| CREATE | During the creation of Client, the Entity Data Table Checks are enabled |
| ACTIVATE | During the activation of Client, the Entity Data Table Checks are enabled |
| CLOSE | While closing the Client, the Entity Data Table Checks are enabled |
The Data Tables which are created are captured in the Data Table drop-down. To create a Custom Data Table, select Admin from the top of the screen and choose System from the drop-down menu. Select Manage Data Tables and click the +Create Data Table button. After creating a Data Table, you will find it listed in the Data Table drop-down menu:

For the created Entity Data Table Check, their respective pages are affected. For instance, an “Entity Data Table Check” for clients has been created for CREATE status. So the create client page consists of wizards as shown below. Here, two “Entity Data Table Checks” are created for create client via wizard i.e., Client Bank Details and Family Details. And their respective fields are created based on the data tables created in Manage Data Tables page.
>>Create Client
This is a create client screen with additional wizard consisting Client Bank Details and Family Details. Only CREATE status will consist of wizards. For other status, additional tabs will be created. After clicking on proceed, the current screen navigates to the next page.