Savings products define the rules, default settings, and constraints for a financial institution’s current/checking and passbook savings accounts. A saving product provides a template for multiple accounts that are or will be held by the financial institution’s clients, groups and centers.
The categories of information required to set up a saving product includes:
- Identifying or descriptive information
- Terms
- Settings
- Charges
- Accounting
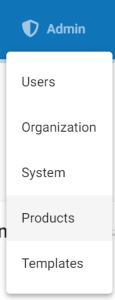
From the homepage, go to Administrator >> Products >> Savings Products.

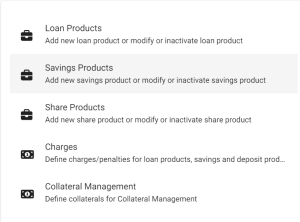
After clicking on Savings Products, click on the blue Create a Savings Product button at the top right of the list.
Create Savings Product
Details

Please referring to the Details on the Image above, the details below are updated with respect to the provided fields number’s.
- Provide Savings Product name .
- Provide Short name.
- Provide Description of this product.
Currency

- Select Currency. Need to have defined required currency: Currency Configuration .
- Provide Decimal places.
- Provide Currency in multiples of. This is to provide total amount rounding off. For example: 10, so total amount gets rounded of to 10’s.
Terms
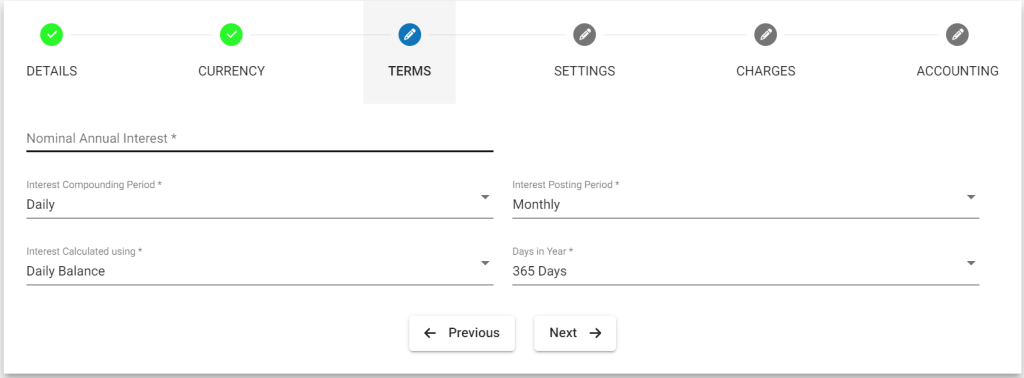
- Provide Nominal annual interest (Rate of interest)
- Select Interest compounding period. For more info refer: Savings Interest Calculation and Posting
Daily
Monthly
Quarterly
Semi-Annual
Annually - Select Interest posting period – Interest get posted for the selected frequency period. For more info refer to: Savings Interest Calculation and Posting: Monthly
Quarterly
Semi-Annual
Annually - Select Interest calculated using. For more info refer: Savings Interest Calculation and Posting
Daily Balance
Average daily balance - Select Days in year – depending upon your financial days in a year practice.
365 Days
360 Days
Settings
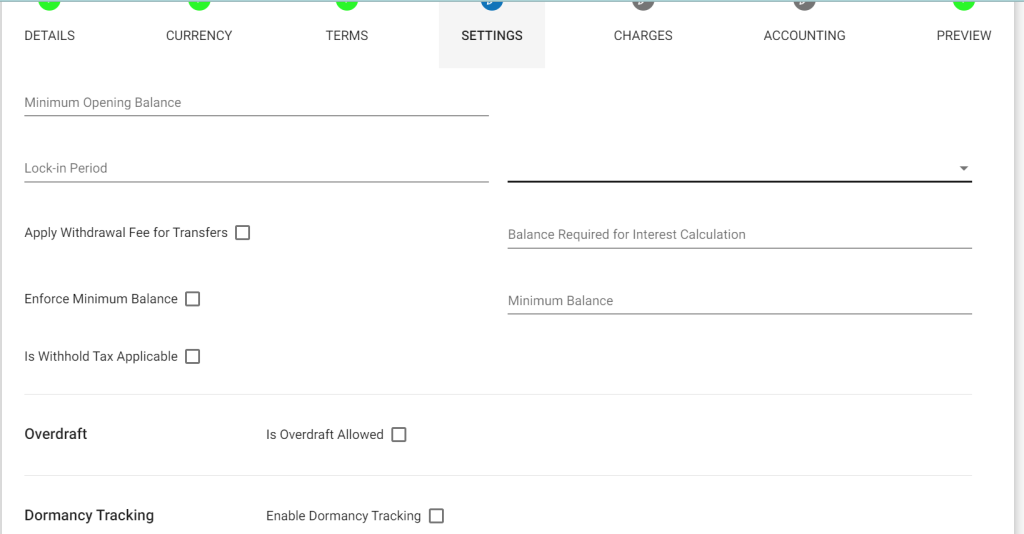
Note: All the settings fields are optional.
- Provide Minimum opening balance – This is to set minimum opening balance. So the provided amount at the time of new savings application submission, gets deposited into savings account once it is activated.
- Provide value for Lock-in period. This is to set lock-in period hence withdrawal wont be allowed for the selected period.
- Select frequency for Lock-in period: Days, Weeks, Months, Years.
- Check the check box to enable withdrawal fee for transfers. To define withdrawal fee refer : Charges
- Provide balance amount for calculating interest. So if the available balance is below the provided minimum balance for calculation, interest wont get generated.
- On checking the check box it is enforcing minimum balance.
- Set up minimum balance to be maintained, by providing amount. Withdrawals wont be possible below the provided amount.
- Checking the check box enables savings account based on savings product to have over draft.
- Enabling Savings dormancy:

- Enable dormancy tracking: Check the check box to enable dormancy tracking for inactive savings account. All the fields 2,3 and 4 below needs a scheduler job to “Update savings dormant account” to be run so as to execute the below status/action.
- Number of days to inactive sub-status: It is theconsecutive number of days of inactive period to mark an account as inactive. For example – Assuming that the number of days is 10 days and that an account has become inactive. On running the respective schedule job on the 11th day, the account moves into inactive sub-status but the account doesn’t get closed. The account will get reactivated on the transaction deposit or withdrawal.
- Number of days to dormant sub-status: It is theconsecutive number of days of inactivity to mark an account as dormant.
- For example -Assuming that the number of days is 15 days and that a savings account has become inactive. On running the respective schedule job on the 16th day, the account moves into dormant sub-status but the account doesn’t get closed. The account will get reactivated on the transaction deposit or withdrawal.
- Number of days to Escheat: It is the consecutive number of days of inactiivity to mark an account as Escheat.For example – Assuming that the number of days is 20 days and that a savings account has become inactive. On running the respective schedule job on the 21st day, the account moves into Escheat and the account gets closed.
Charges

In order to use Add charge, you should have already defined it in charges. For more information on charges, refer here: Charges.
Accounting

By default Accounting will be disabled – None:- Meaning If you are using this product for various transactions like deposits, withdrawals, etc. these transactions are not passed in the journal entry.
Enabling accounting for the savings product:-
>> You should have created chart of accounts, for info refer: https://saworks.azurewebsites.net/docs/accounting/chart-of-accounts/how-to-create-a-chart-of-accounts/.
>> To enable Accounting, you need to select cash accounting. As of now, Phénix supports only cash accounting for savings product.
- Cash
>> Map accounts with respect to the savings product accounts. For information on these accounts refer: A Possible accounting Spec– Accounting rules for savings.
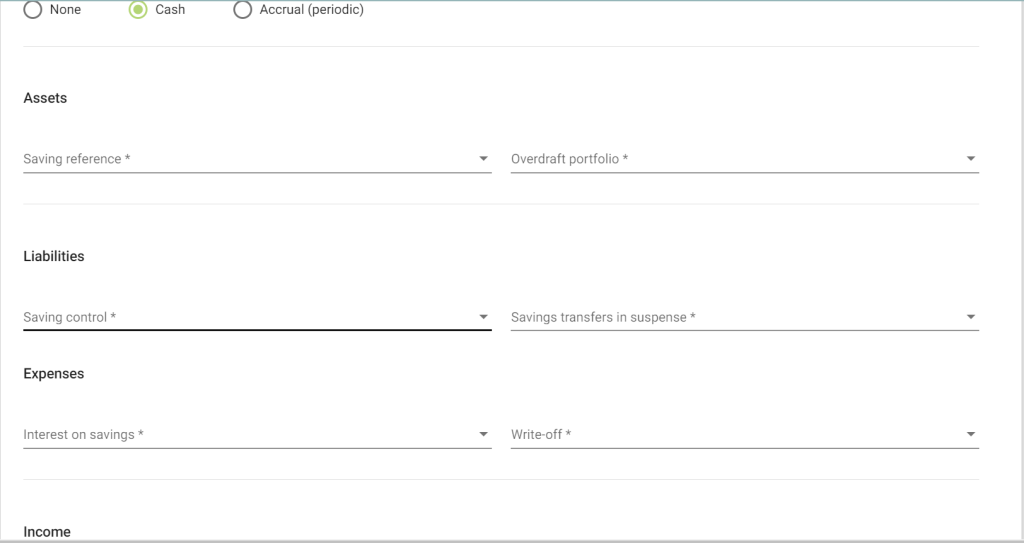
Advanced Accounting Rule
On clicking on the show button it enables Advanced Accounting Rule.

If you click on Add button, it will expand and show selection drop-downs.
- Configure Fund sources for Payment Channels.
For Example: In the image shown above, Payment type – Cheque is mapped to Fund source – Bank. So whenever payment type is used for transaction. Journal entry for Account – Bank will be passed. - Map Fees to Income Accounts.
- Map Penalties to Specific Income Accounts
Click on Submit button to Save/Create savings product.
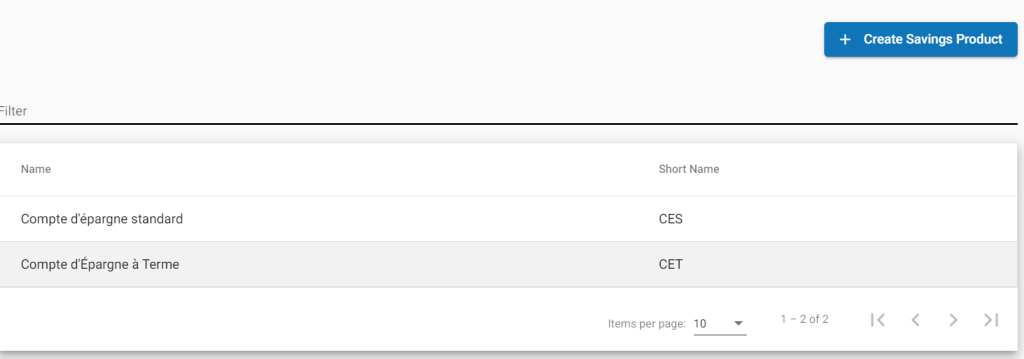
View Savings Product
Go to Admin>>Product>>Savings Product

The image above shows the Savings products list.
Edit savings Product
Go to Admin>>Product>>savings Products>>Select savings product (Example: Standard Savings Account ) >> then click on Edit button.
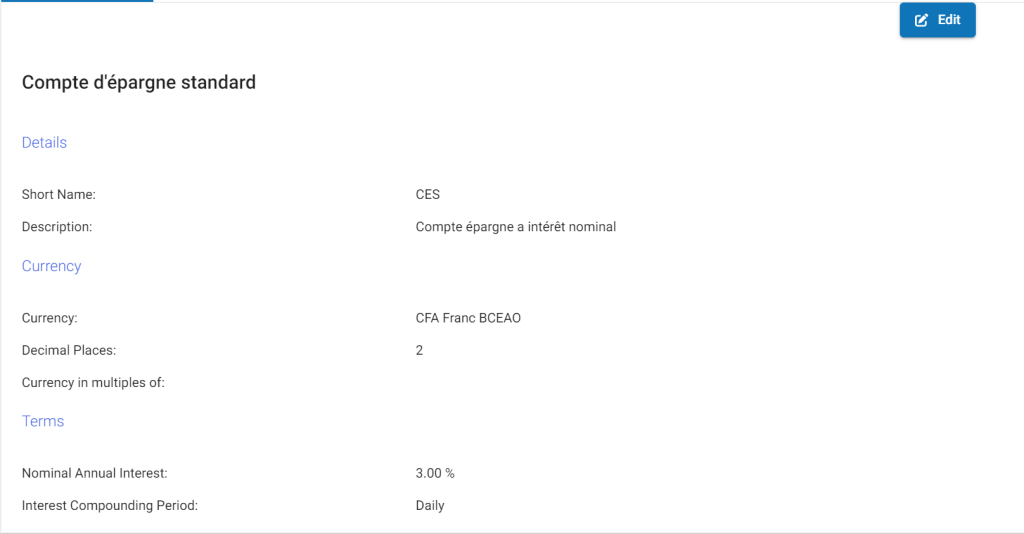
Example of creating a savings product
Details
- Name: Standard Savings Account
- Product Code: CE-STD
- Description: A standard savings account with a 3% annual interest rate and the ability to deposit funds at any time.
Currencies
- Currencies: FCFA
- decimal: 2
- currencies in multiples of: 0
Terms
- Nominal annual interest:3%
- Interest Compounding Period: Daily
- Interest Posting Period: Daily
- Interest Calculated using: Daily Balance
- Days in Year: 365 Days
Settings
- Minimum opening balance: 2000
- Lock-in Period: 1 year
- Apply withdrawal fee for transfert
- 10000 FCFA
Charges
- Monthly fees for balance below the minimum: 500 FCFA per month
Accounting
- None