Saving accounts may be created for active clients, active groups.


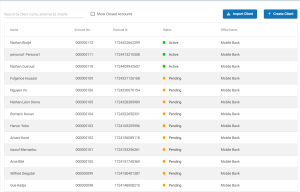
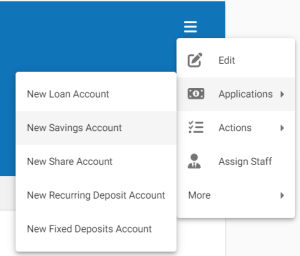
To create a savings account request for a customer, select the customer (requires a link to how to find a customer). Click the hamburger button.
Click on Applications and on new savings account.
Select the savings product on which to base the savings account from the list of products.
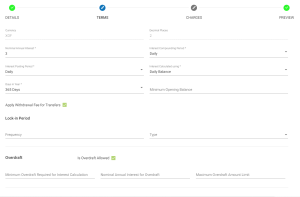
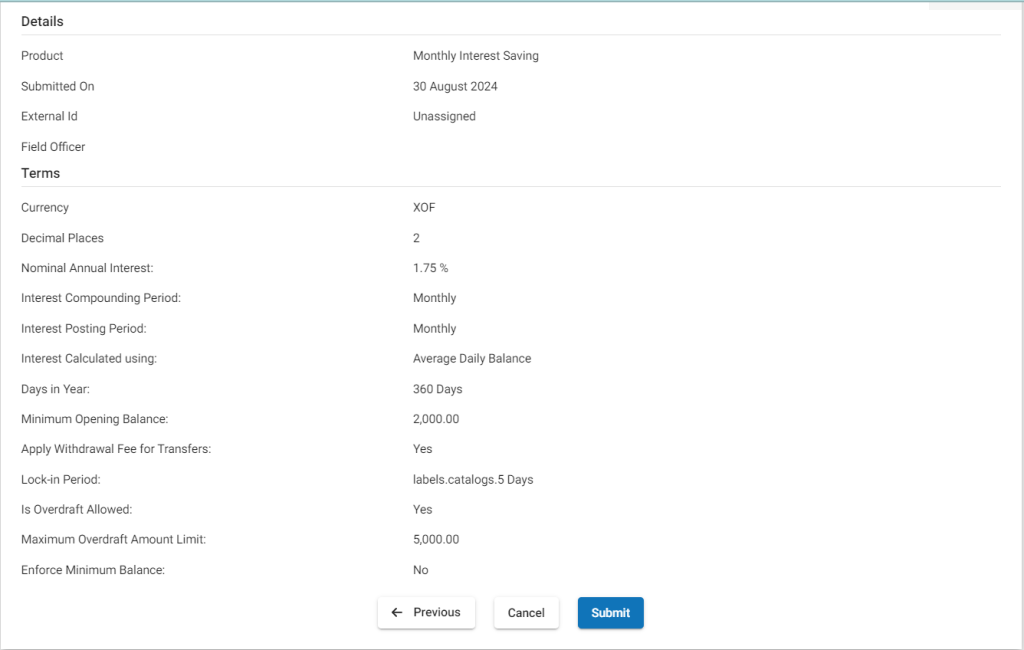
Complete the Savings Account fields with any default changes allowed and applicable to the Savings Account application. Click Submit.
The savings account application will be created with the status Pending approval. Your financial institution will define the workflow and permissions for approving savings accounts.
Saving Account
A Saving Account is an instance of any Saving Product. A Saving Account has the following attributes:
- A unique Account Number
- A specified Interest Rate
- External ID
- Minimum Opening Balance
- Lock-in Period and so on.
Every Saving Account is either owned by a client or by a group.
A Saving Account can be created for an activeclient or group based on a Saving Product (the Saving Product needs to be active on the submitted date). When a Saving Account is created, it inherits the rules and defaults from the Saving Product it is based on. Your financial institution may allow some of the inherited information to be modified for a saving account.
Existing saving accounts are unaffected when the saving product they are based upon is changed in the future.
A client may have more than one active saving account (as defined by a financial institution’s policies, these can be configured in the Product Mix).
In the case of a group saving application, individual client saving accounts belonging to members of the group are included for the purposes of applying product mix rules.
Creating a Saving Account
To create a Saving Account, follow these steps:
- Navigate to a specific customer, click on the group and click on the Application >> New Savings Account >> hamburger menu for the customer (see screenshot above) or “Savings Request” for the group. The following window will be displayed:


- Fill in the details for the corresponding fields and click on the ‘Submit‘ button submit.
- Approve and Activate the Saving Account.
The possible Saving Account actions/transactions, their availability, and their effects on the Saving Account Life Cycle Status are tabulated below:
| Previous Status | Action | Resulting Status |
| N/A | New Saving | Pending Approval |
| Pending Approval | Modify Application | Pending Approval |
| Add Saving Charge | Pending Approval | |
| Modify Application | Pending Approval | |
| Reject | Rejected (cancel) | |
| Assign Staff | Pending Approval | |
| Withdrawn by Client | Cancelled (withdrawn) | |
| Delete | Cancelled | |
| Approved | Undo Approval | Pending Approval |
| Activate | Saving Account Created | |
| Add saving charge | Approved | |
| Assign staff | Staff assigned (approved) | |
| Active | Add saving charge | Active |
| Deposit | Active | |
| Withdraw | Active until the amount in saving account is greater than zero. | |
| Calculate Interest | Interest calculated and shown on the same window | |
| Unassigned staff | Assign Staff | |
| Transfer Fund | throwing error: insufficient fund to transfer.. ?? | |
| Close | Withdraw balance and Saving Account is closed. |
Saving Account Overview
A typical Saving Account overview is displayed in the image below (with all the options mentioned in the table above):


In the Saving Account Overview, you can view the following:
- Summary
- Transactions
- Charges (related to the Saving Account)
Group Saving Account
A Group Saving Account is a single Saving Account shared by all members of a group. All the members of the group can perform deposit/withdraw operations. The group is treated collectively by the financial institution as a single entity.
Saving Account Transactions
The following transactions are possible under a Saving Account:
Deposit:
In order to deposit an amount to a Client’s/Group’s Saving Account, refer to the following steps:
- Navigate to the Client’s profile (refer to this link to learn more about Clients: Manage Clients).
- Select the Savings Account and open it.
- Click on the ‘Deposit‘ tab. The following window will be displayed:


- Enter the Transaction Date, Transaction Amount and Payment Type in the fields displayed in the image above.
- Click on the ‘Submit‘ button to make the deposit.
- Finally, go to the Savings Account overview and click on the ‘Transactions‘ tab to confirm the deposit.
Withdraw:
In order to allow a client to withdraw any amount from a Savings Account, refer to the following steps:
- In the Client’s Saving Account overview, click on the ‘Withdraw‘ tab. The following window will be displayed:


- Enter the Transaction Date, Transaction Amount and the Payment Type in the fields displayed in the image above.
- Click on the ‘Submit‘ button to make the withdrawal.
- Finally, go to the Savings Account overview and click on the ‘Transactions‘ tab to confirm the withdrawal.